Custom Fields (CF Variables)
Businesses need reports, and while there are many "canned" reports that cover the majority of needs, sometimes customers require minor changes, such wording, or omission or inclusion of other data points. One way to accomplish these customization's is to write custom versions for each client, but this has a very negative side effect—whenever you enhance the canned report, you must reproduce the changes in each of the custom reports, which would be incredibly time consuming as well as extremely difficult to track.
The other option, and in our opinion the better, more sustainable option, is to create settings within the reports, allowing the individual companies to choose, within limits, the desired output format.
In Livery Coach this is accomplished with something we call CF variables. CF variables allow you, the users, to quickly and easily make changes without having any programming or report writing knowledge.
For example, you might want to change the default “Gratuity” on Chauffeur Trip Sheets to something different—say, “Recommended Tip”. Or, you might not want to show the estimated drop-off time on your Customer Confirmation.
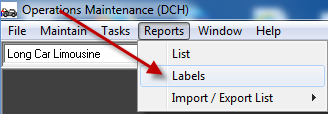
To access and change the CF variables built into the reports, launch Livery Coach Maintenance, and then select Reports…Labels.
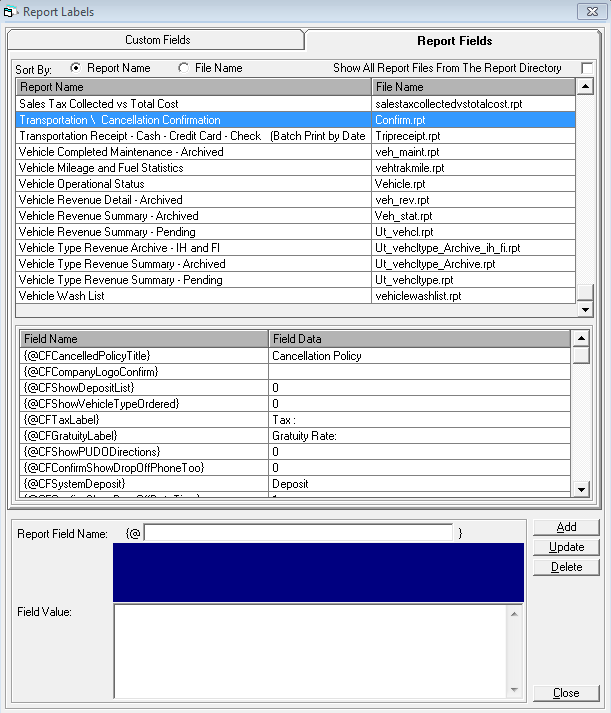
Once there, you will notice that there are two tabs at the top…”Custom Fields” and “Report Fields”
The other option, and in our opinion the better, more sustainable option, is to create settings within the reports, allowing the individual companies to choose, within limits, the desired output format.
In Livery Coach this is accomplished with something we call CF variables. CF variables allow you, the users, to quickly and easily make changes without having any programming or report writing knowledge.
For example, you might want to change the default “Gratuity” on Chauffeur Trip Sheets to something different—say, “Recommended Tip”. Or, you might not want to show the estimated drop-off time on your Customer Confirmation.
To access and change the CF variables built into the reports, launch Livery Coach Maintenance, and then select Reports…Labels.
Once there, you will notice that there are two tabs at the top…”Custom Fields” and “Report Fields”

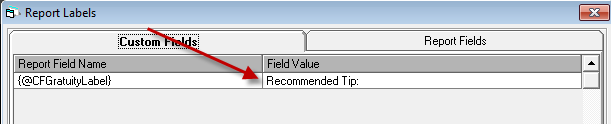
The “Custom Fields” tab shows you all the report labels (CF variables) that you have specifically selected and entered values (even if the values are the same as default); the “Report Fields” tab shows you every report, and when you select the report, will show you all the CF variables in that report and what the default values are.
For example, in the screen shot below, I have selected the confirmation report. Once selected, it may take a few seconds for the “Field Name” and “Field Data” fields to populate—so be patient.
For example, in the screen shot below, I have selected the confirmation report. Once selected, it may take a few seconds for the “Field Name” and “Field Data” fields to populate—so be patient.
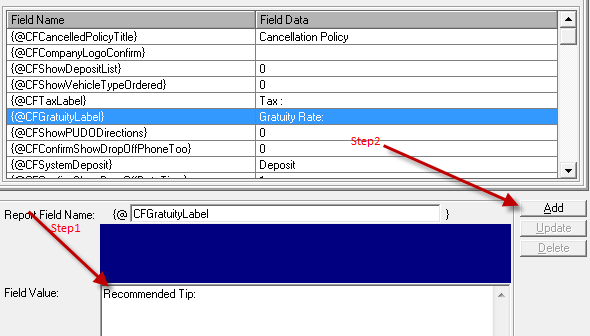
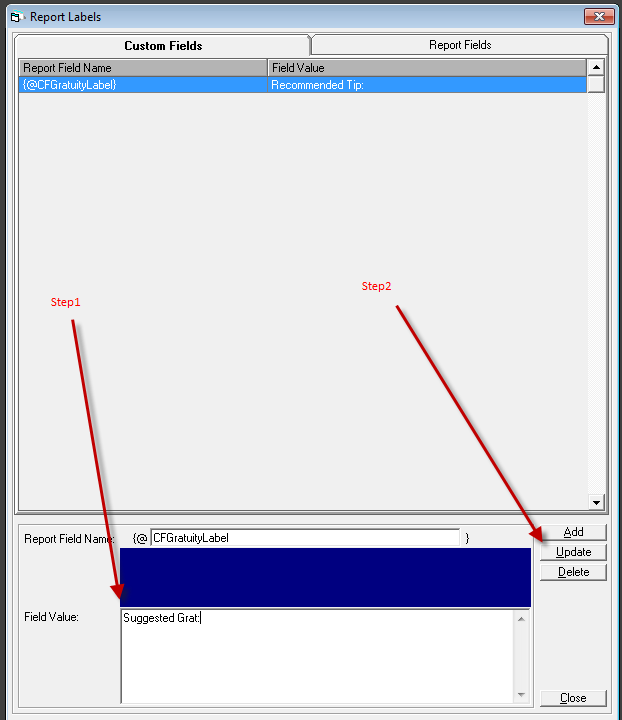
If I want to make a change, I select the variable, and type in what I want in the lower white box. For example, if I want to change the gratuity label from “Gratuity Rate:” to “Recommended Tip:” I highlight it, type in the text, and then click “Add”.
Now, if you highlight the label again on the Report Fields tab, you will notice that it is still the default—that’s because the Report Fields tab ALWAYS shows the default settings—what is built in to the report.
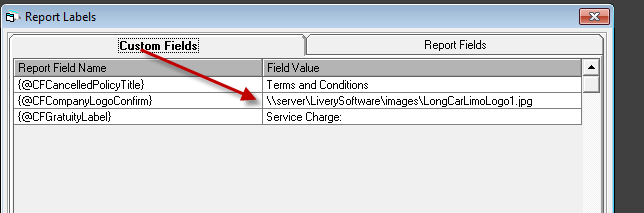
But, if you select the “Custom Fields” tab, you will see the field you just added.
But, if you select the “Custom Fields” tab, you will see the field you just added.
If you want to make further changes to this variable, there is no need to go back and find it on the Report Fields tab…just select it here, make the changes below, and click “Update”.

Some more things you can change with CF Variables....
On the confirmation, besides the Gratuity, you can also change the “Cancellation Policy” wording (many people change this to “Terms & Conditions”) as well as some of the other text.
Some of the fields are set to “0” or “1” which usually means “hide” or “show” (but read the description of the variable carefully—some are reversed).
The “CFShowDepositList”, if changed from 0 to 1, will show all the deposits (down payments) you have taken on a trip. The “CFShowPUDODirections” will show if you have any directions in a trip.
The “CFConfirmNotesFontSize”, which is set by default to “9”, can be changed if you want to print of the Trip Notes to be larger or smaller. If you want to hide the notes completely, simply change the CFConfirmShowResNotes to 0.
CF variables can also be used to put your logo on confirmations, receipts, etc.
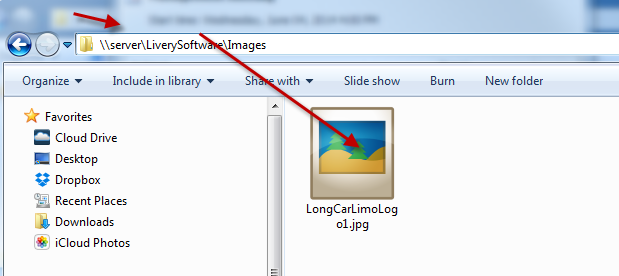
In order to do this, you first need the logo in a jpg of an appropriate size. Then, put it somewhere on your server (accessible by all workstations—we recommend creating a directory under \\liverysoftware called “images” or “graphics”.
Then, look for the CF variable that refers to an image, and point it to the proper path on the server. Here is an example of how to put your logo on a confirmation.
Suppose you have a logo the proper size for your confirmation, and you have already put it in the directory you created—in our example below, the logo file is called “LongCarLimoLogo1.jpg” and it is on the server, in the Images directory.
Some of the fields are set to “0” or “1” which usually means “hide” or “show” (but read the description of the variable carefully—some are reversed).
The “CFShowDepositList”, if changed from 0 to 1, will show all the deposits (down payments) you have taken on a trip. The “CFShowPUDODirections” will show if you have any directions in a trip.
The “CFConfirmNotesFontSize”, which is set by default to “9”, can be changed if you want to print of the Trip Notes to be larger or smaller. If you want to hide the notes completely, simply change the CFConfirmShowResNotes to 0.
CF variables can also be used to put your logo on confirmations, receipts, etc.
In order to do this, you first need the logo in a jpg of an appropriate size. Then, put it somewhere on your server (accessible by all workstations—we recommend creating a directory under \\liverysoftware called “images” or “graphics”.
Then, look for the CF variable that refers to an image, and point it to the proper path on the server. Here is an example of how to put your logo on a confirmation.
Suppose you have a logo the proper size for your confirmation, and you have already put it in the directory you created—in our example below, the logo file is called “LongCarLimoLogo1.jpg” and it is on the server, in the Images directory.
So now I go to Report Fields, select Transportation \ Cancellation Confirmation, and then highlight “CFCompanyLogoConfirm”.
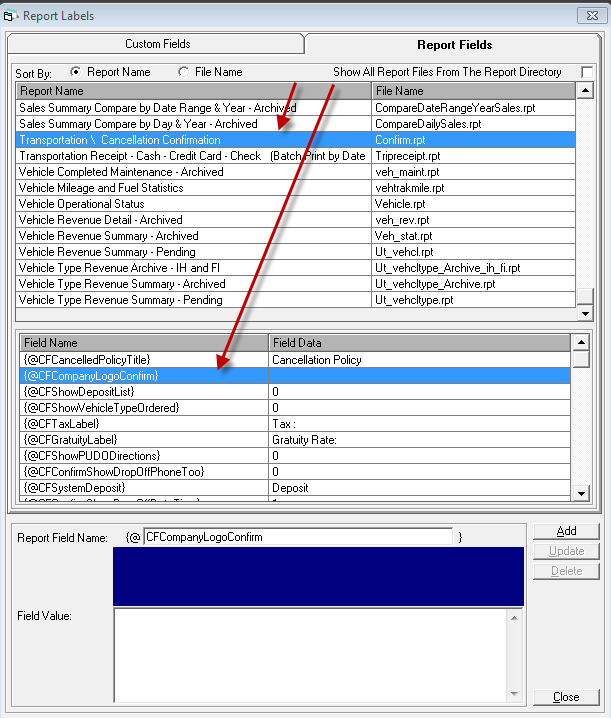
Now, in the field value, type in the path to that logo:
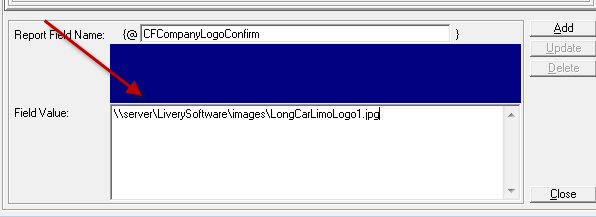
Once you click on “Add”, you will see the variable set on the “Custom Fields” tab, and your logo will appear on your confirmation.